|
NetShield
Installer
|
|
Below are the steps for installing the program on
any server, website, or any computer that is connected to the
Internet or Intranet. Click on the images to enlarge.
|
| Step 1: |
 |
|
|
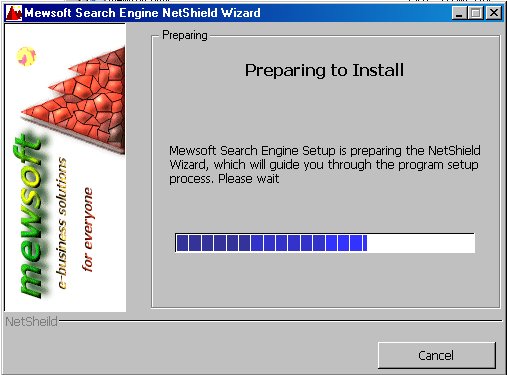
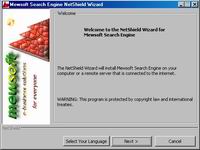
Figure (1). NetShield Wizard Startup.
Please wait.
|
|
| Step 2: |
 |
|
|
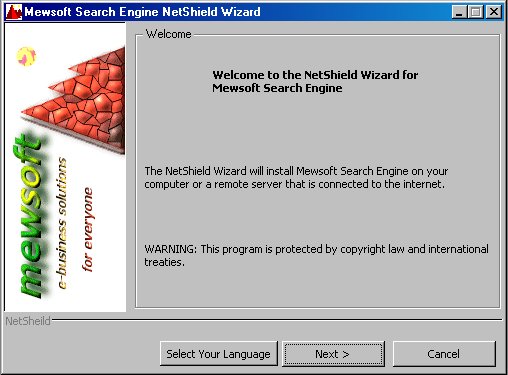
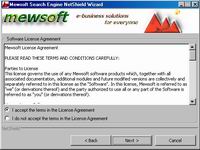
Figure (2). NetShield Wizard Welcome.
Click Next.
|
|
| Step 3: |
 |
|
|
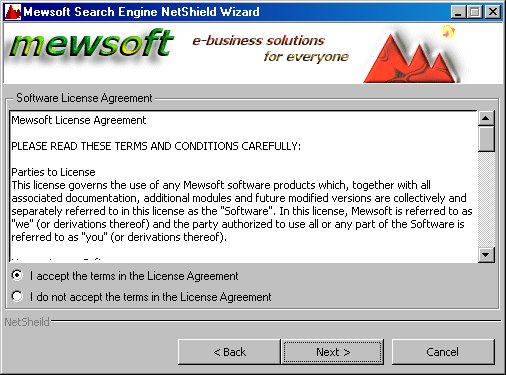
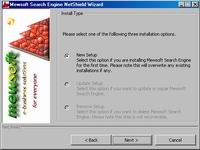
Figure (3). NetShield Wizard License
Agreement. Click Next.
|
|
| Step 4: |
 |
|
|
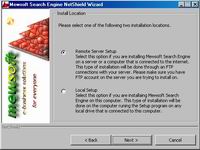
Figure (4). NetShield Wizard Install
Type. Select New Setup and click Next.
|
|
| Step 5: |
 |
|
|
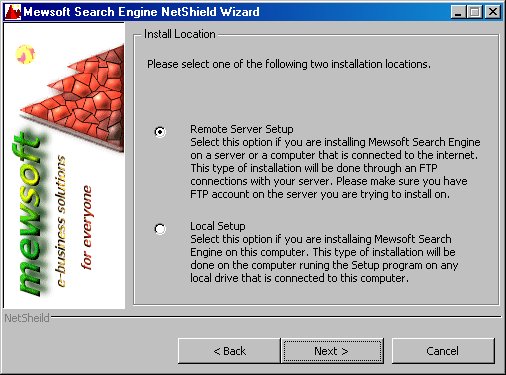
Figure (5). NetShield Wizard
Install Location. You can install the search engine on any remote
computer, server, website through an Internet or Intranet connection, or
install it locally on your hard drive.
Select Remote Server Setup and
click Next to install it on a website or a server. Your computer must be
connected to the internet for this type of installation.
|
|
| Step 6: |
 |
|
|
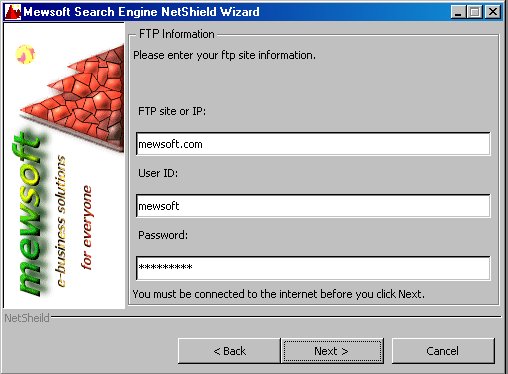
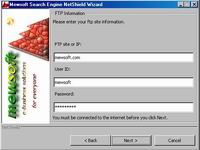
Figure (6). NetShield Wizard FTP
Information.
The NetShield Wizard will install
the program on your server or website through an FTP (File Transfer
Protocol). You must have an FTP account on your server to do this. Enter
your server FTP address, for example ftp.yourdomain.com, your FTP login,
and your FTP password. You must be connected to the internet now. Click
Next.
|
|
| Step 7: |
 |
|
|
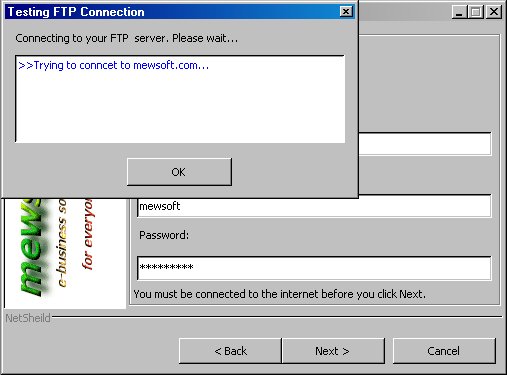
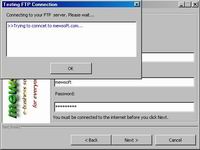
Figure (7). NetShield Wizard FTP
Connection.
Please wait until the NextSheild connects to your
server.
|
|
| Step 8: |
 |
|
|
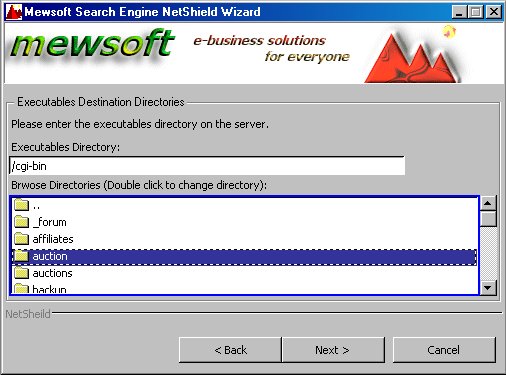
Figure (8). NetShield Wizard
Executables Directory.
Now the NetShield connected to your
server and displaying a list of the directories in your root directory.
You can browse normally your server directory from this FTP explorer
built in the NetShield.
Now you need to enter or browse to
the executables directory on your server. This is the directory where you
can execute program. Normally this directory is called cgi-bin, cgi-scripts,
or else. if you do not know, ask your server administrator or hosting
company, also you may read your server documentation. On most windows
servers and unix server that has cgi-wrap installed, you can run programs
from any directory.
On most servers this directory
looks like these:
/cgi-bin
/www/cgi-bin
/home/usr/yourdomain/cgi-bin
/web/cgi-bin
/home/web/cgi-bin
...
Enter your server executables
directory and click Next.
|
|
| Step 9: |
 |
|
|
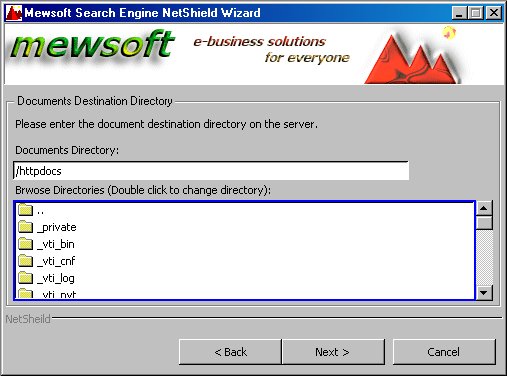
Figure (9). NetShield Wizard
Documents Directory.
Now the NetShield is still
connected to your server and displaying a list of the directories in your
root directory. You can browse normally your server directory from this
FTP explorer built in the NetShield.
Now you need to enter or browse to
the document directory (also called, the html directory, or non
executables directory) on your server. This is the directory where you can
not execute program but you can view html files, download files, and so
on. Normally this directory is your root directory or a subdirectory of
it. if you do not know, ask your server administrator or hosting company,
also you may read your server documentation. On most servers this is your
root directory.
On most servers this directory
looks like these:
/
/www
/home/usr/yourdomain
/home/usr/yourdomain/html
/home/usr/public_html
/web
/home/web
/home/web/html
...
Enter your server documents
directory and click Next.
|
|
| Step 10: |
 |
|
|
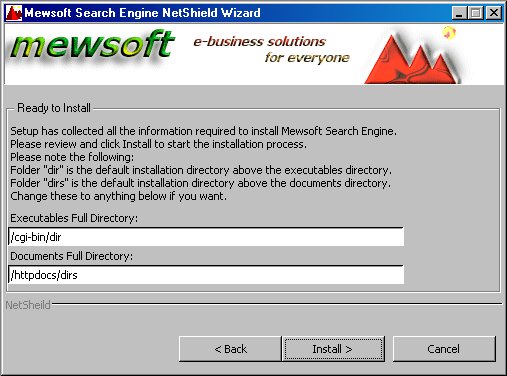
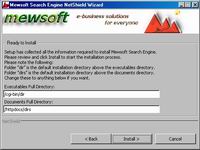
Figure (10). NetShield Wizard Ready
to Install.
The NetShield Wizard has collected
most the information now required for the installation.
The NetShield Wizard will suggest
the default folders above your executables and documents directory to the
install the program. These default folders are "dir" and "dirs".
Therefore the Wizard will append
"/dir" to your executables directory and "dirs" to the
documents directory.
For example if you entered /cgi-bin
as your executables directory, the Wizard will display /cgi-bin/dir as the
full directory for installation, of course you can modify this to
anything. If you do not know, please leave the default.
The same for the documents
directory, for example if you entered, /httpdocs as your documents
directory, the Wizard will append "dirs" to the directory and
will display /httpdocs/dirs, of course you can modify this to anything. If
you do not know, please leave the default.
Please review or modify the
information and click Next to start the installation process.
|
|
| Step 11: |
 |
|
|
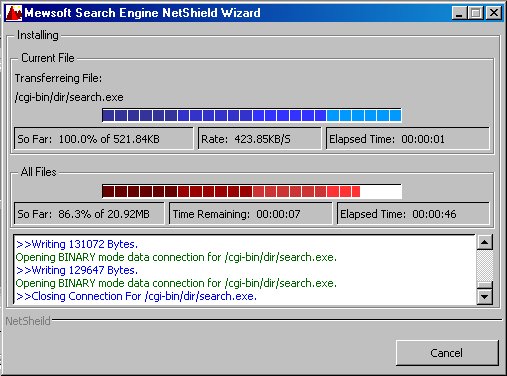
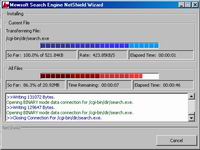
Figure (11). NetShield Wizard
Installaing. Please wait.
The NetShield Wizard is now
installaing on your server and displaying the progress.
This process may take from few
seconds to several hours depending on your internet connection speed. If
you are on a LAN, broadband like DSL or Cable, then this process will take
less than 50 seconds. if you are on a slow modem connections 56K or so,
then expect to wait 50 or more minutes.
Please wait until this process
finished.
|
|
| Step 12: |
 |
|
|
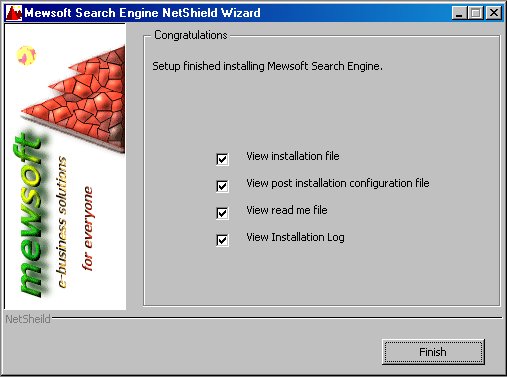
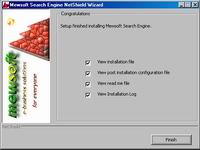
Figure (12). NetShield Wizard
Finished.
The NetShield Wizard has finished
the installation on your server. Check the files you want to view and
click Finish.
May be it is important to check and
view the Log File. This file contains the actions done by the installer,
all the files status, and so on.
You can view these files at any
time as they reside in the directory where the program is installed on
your computer.
|
|
| Step 13: |
 |
|
|
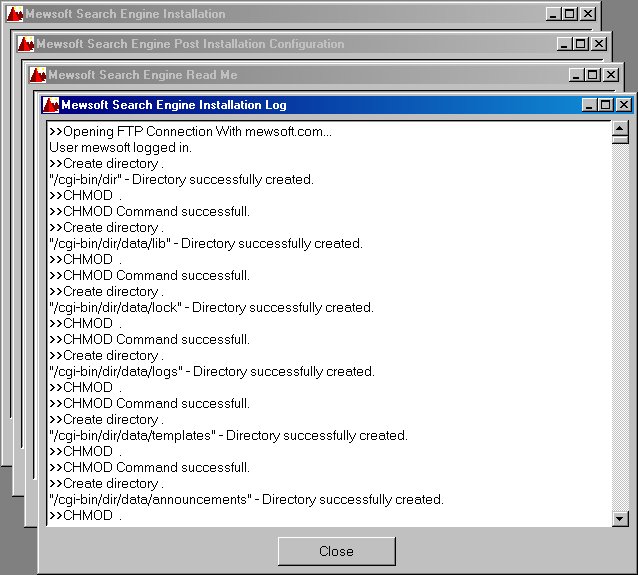
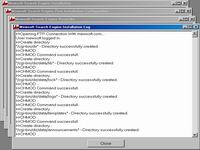
Figure (13). NetShield Wizard View
Files.
|
|
| Step 14: |
If everything went as it is supposed to
be, then the NetShield has installed successfully the program. The next
step it to start the post installation configuration. |
|
|
Next
Step - Post Installation Configuration >> |
|
|
|
|
|
|
|